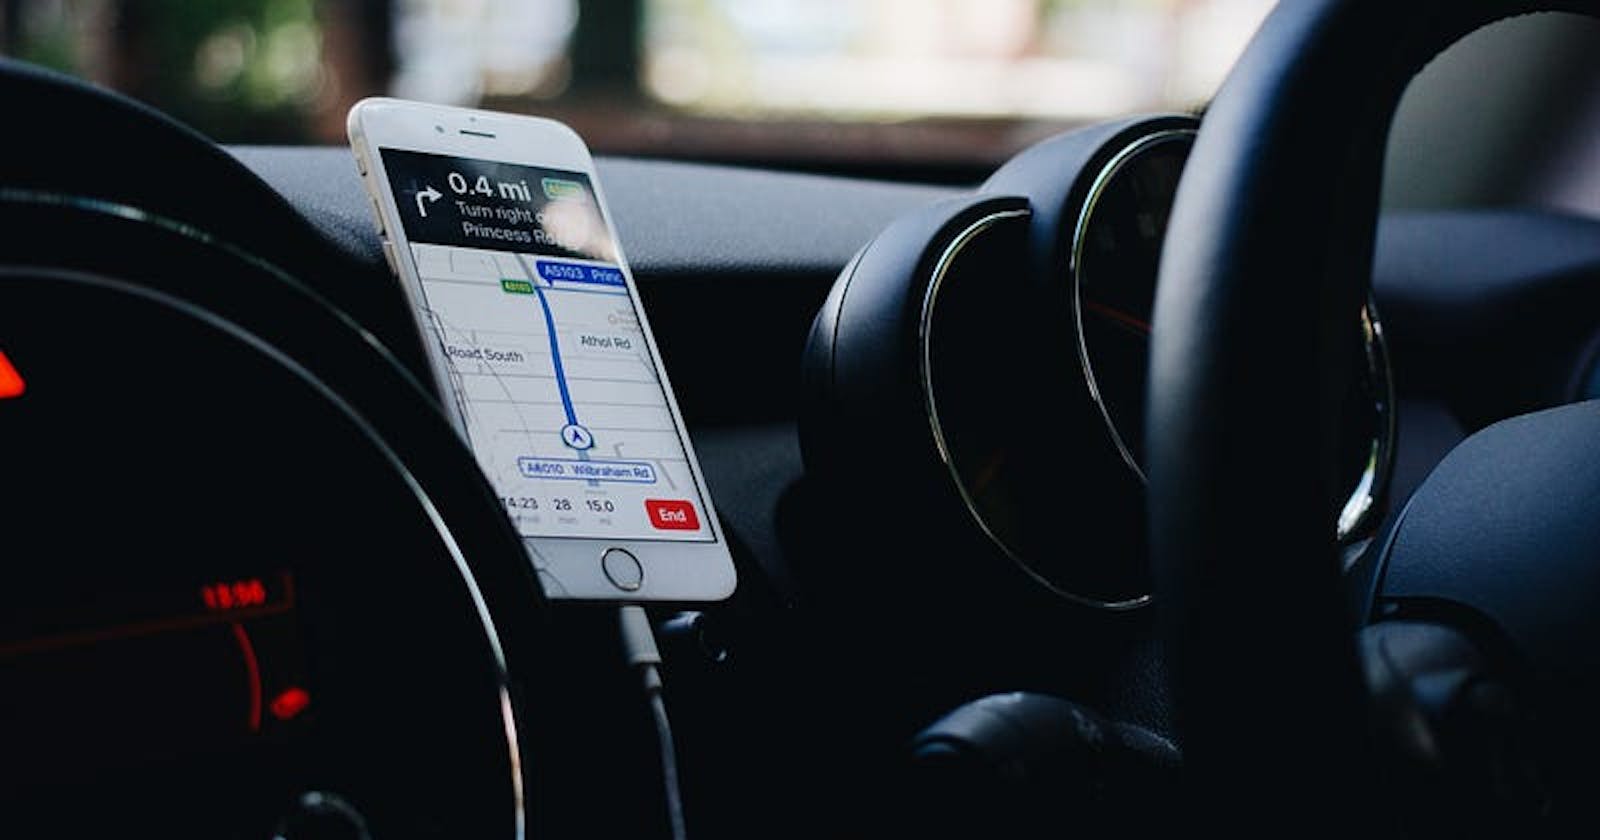
Welcome back today we will see how to create a vehicle tracker app using firebase real-time database and cloud functions with react native navigation
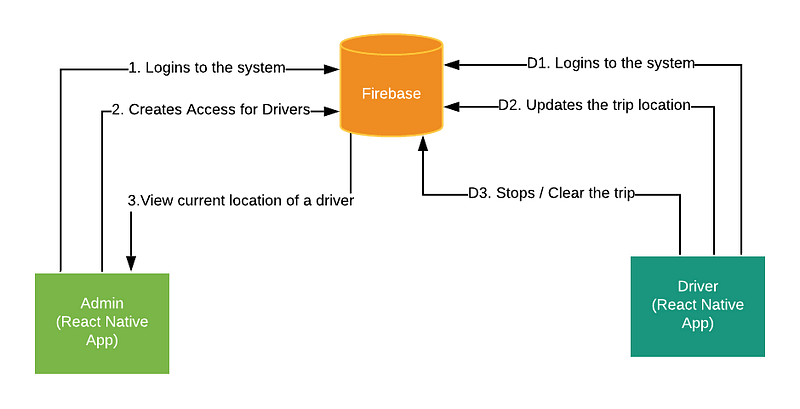
We will create both admin and driver part in a single app and add the roles using firebase cloud functions.
Real-time DB Structure
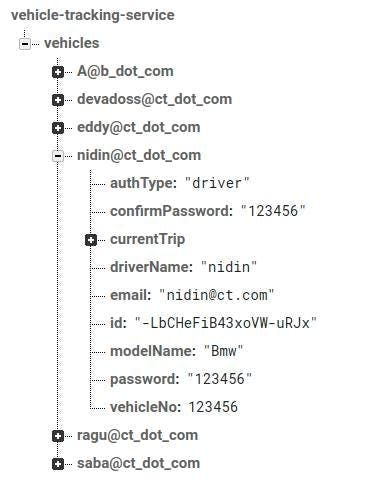
In the vehicles part, we can see mail IDs and auth types which are created by the admin.
The driver logins in with the email id and password and updates the current trip details by clicking START Button.
Once the STOP button is clicked the current trip details get cleared off from the real-time database
Meanwhile, the admin can see the current trip details of each user. If there is no current trip then the driver will be in a halt state or else in a moving state.
Let's begin with the initial setup of creating a React native application and installing the plugins.
react-native init vehicletracker
once the project is created install the below-mentioned plugins
"@mapbox/polyline": "^1.0.0"
"react-native-firebase": "^5.2.3",
"react-native-geolocation-service": "^2.0.0",
"react-native-maps": "^0.23.0",
"react-native-navigation": "^2.16.0",
"react-redux": "^6.0.1",
"redux": "^4.0.1",
"redux-form": "^8.1.0",
"redux-thunk": "^2.3.0"
Plugins Link
React Native Firebase — Link
React Native Maps — Link
React Native Navigation — Link
React Native polyLine — Link
Note: Kindly get the Google Maps directions API key
We have done the client part and now it’s turn for the Firebase.
Create a New Firebase project and enable the Email / Password sign-in method in Authentication.
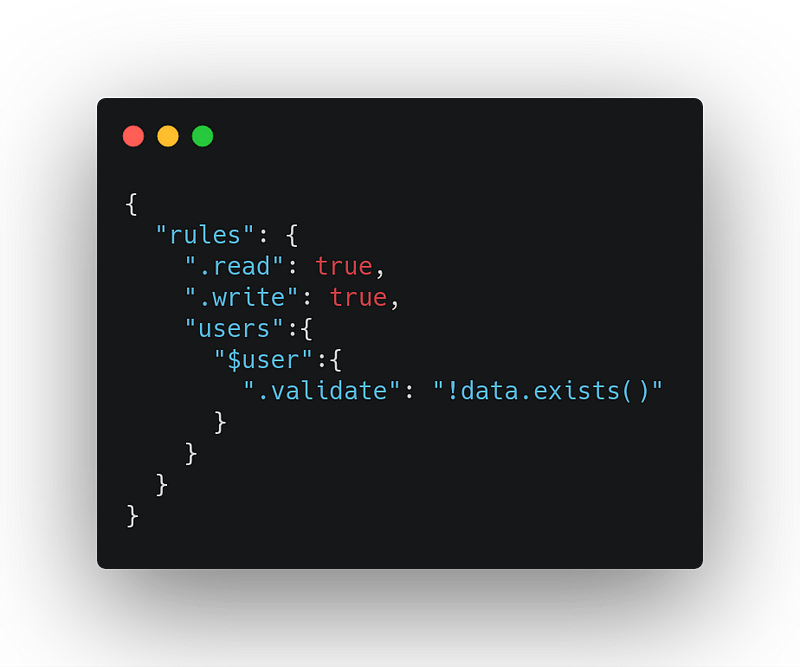
Create a Real-time database and add the security rules
We have done the initial setup of our project and now it’s time to make our hands dirty.
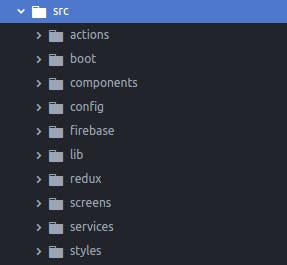
Folder Structure
Goto index.js and replace the code with below lines
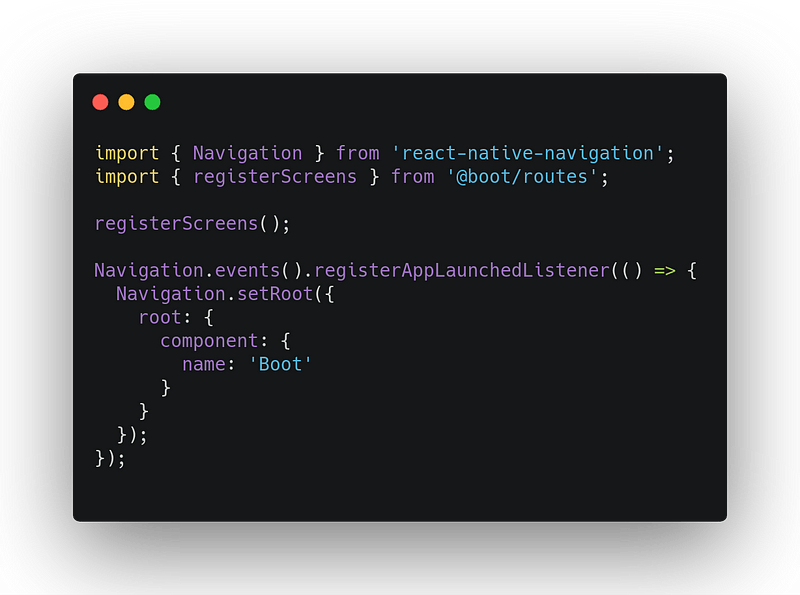
Once the code is replaced go to the boot folder and create the below files
touch index.js Boot.js navigation.js routes.js BootStyleSheet.js
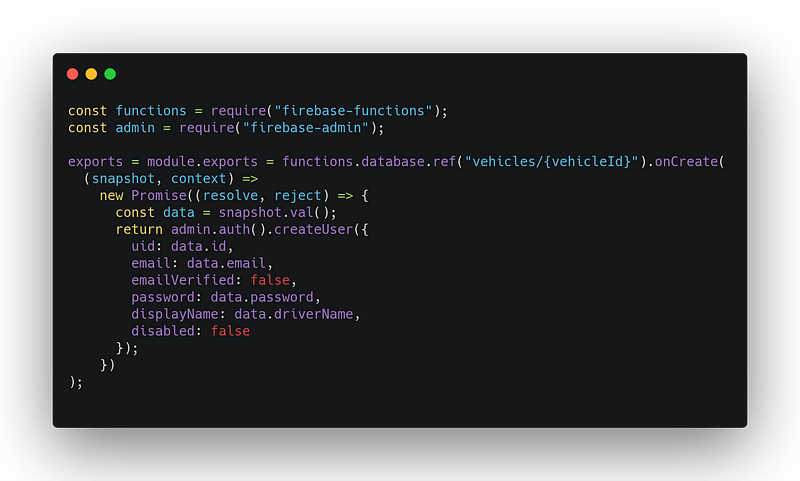
We will create a cloud function to create an authentication once a vehicle is added by the admin
To Check user is authenticated or not
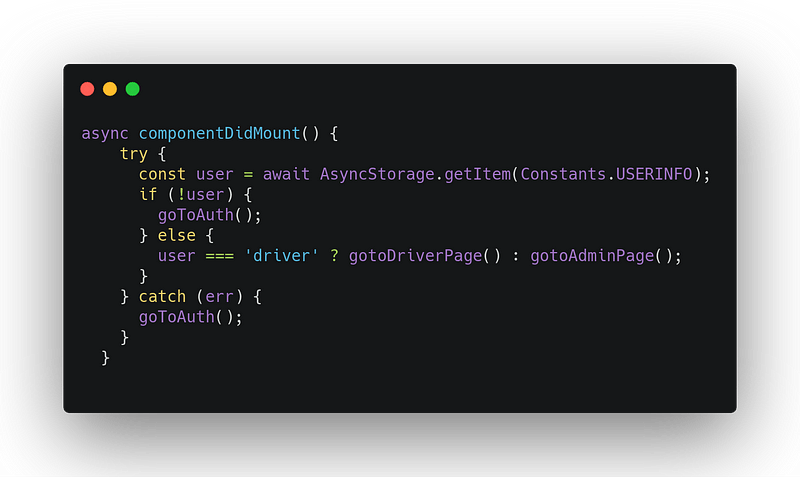
Here we will check whether the user is authenticated or not. If authenticated and user type is driver then we will navigate to Driver Module else to Admin Module.
If not authenticated then go to Sign In Module.
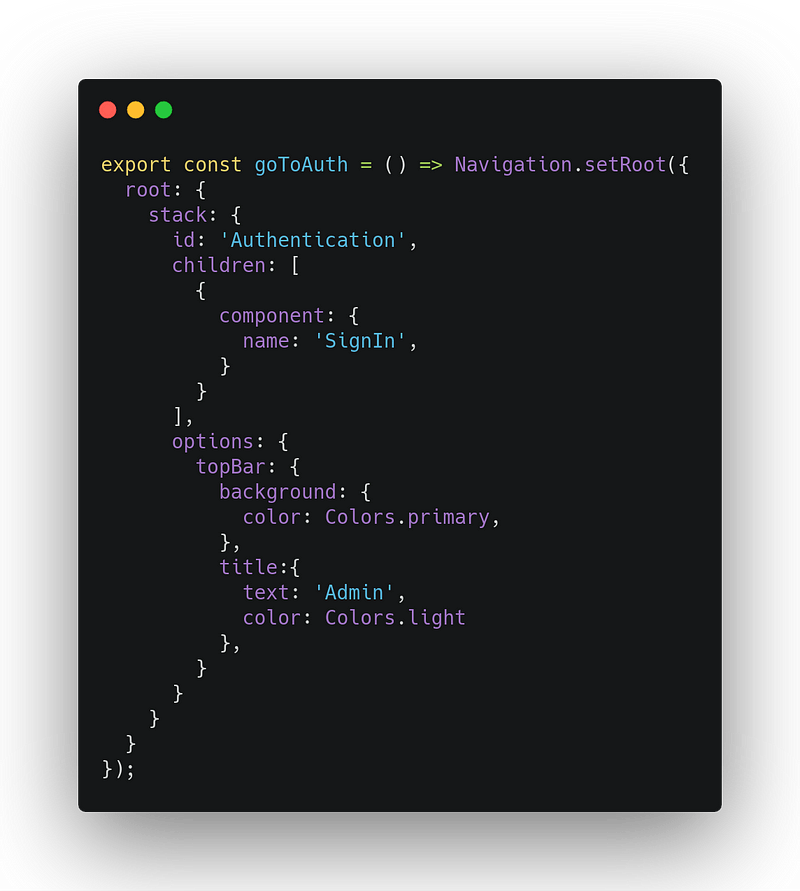
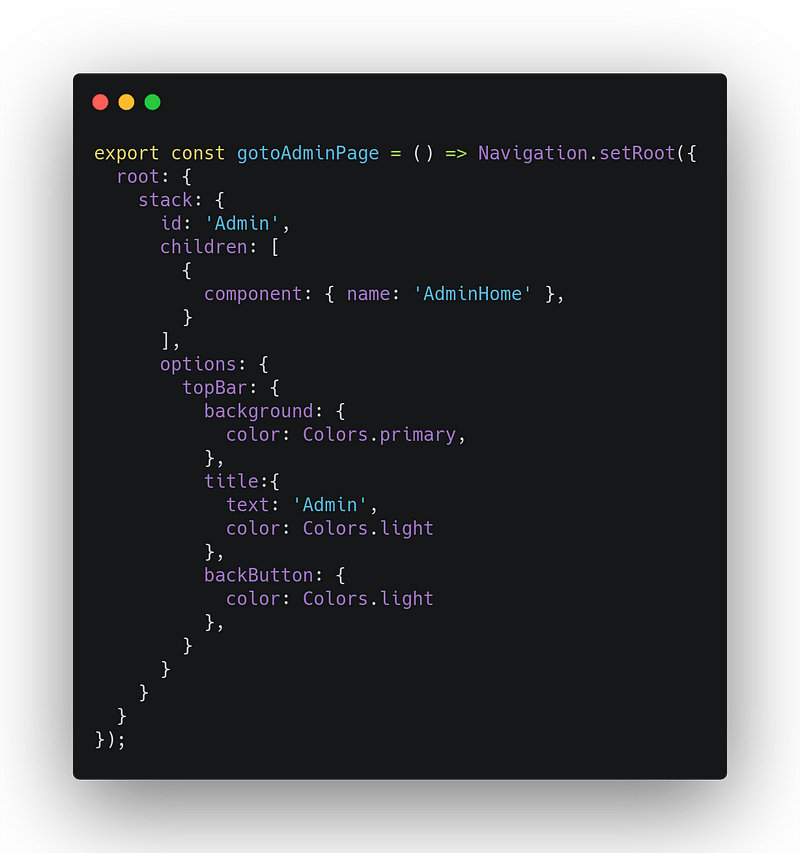
Navigation.js
- Navigation to Auth Module
- Navigation to Admin Module
- Navigation to Driver Module
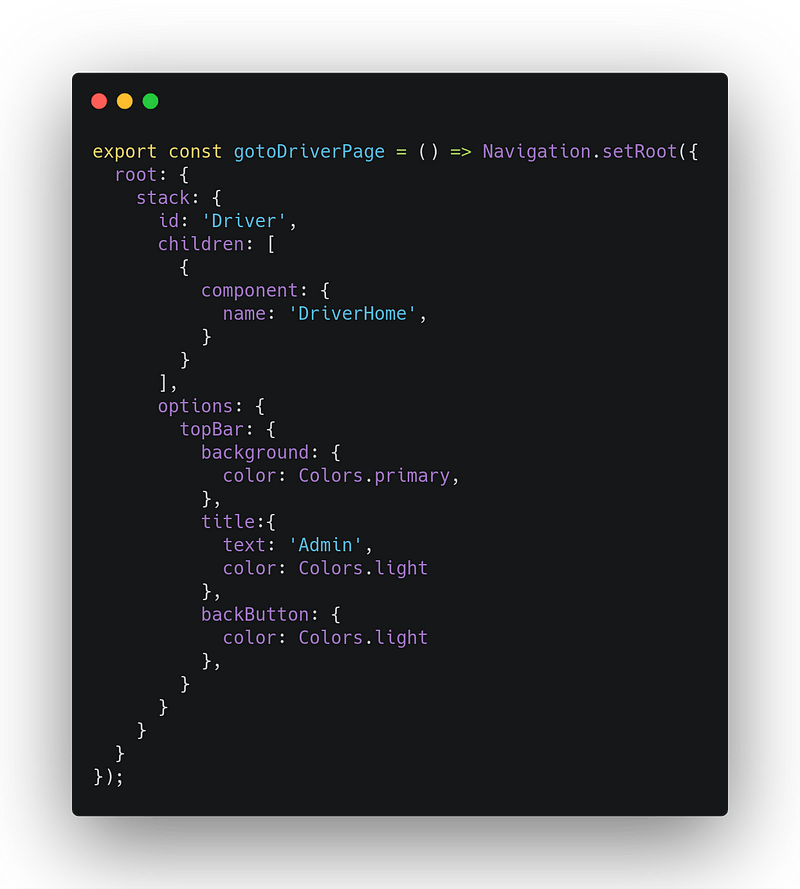
Here we will define the list of screens for each module.
Routes.js
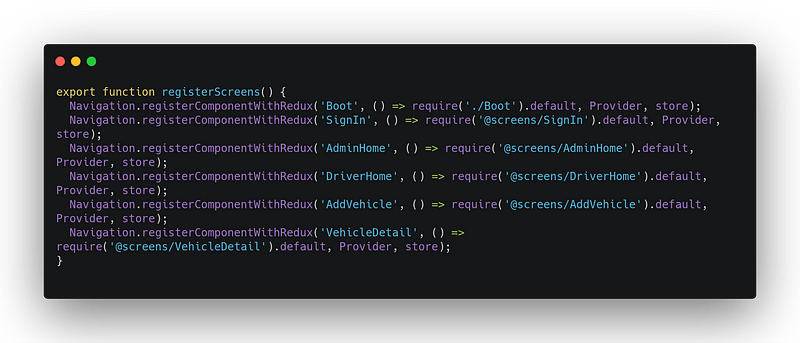
We will define the routes of each screen. Since we are using redux we will define the navigation as registerComponentWithRedux
Navigation.registerComponentWithRedux('Name', () => require('./Name').default, Provider, store);
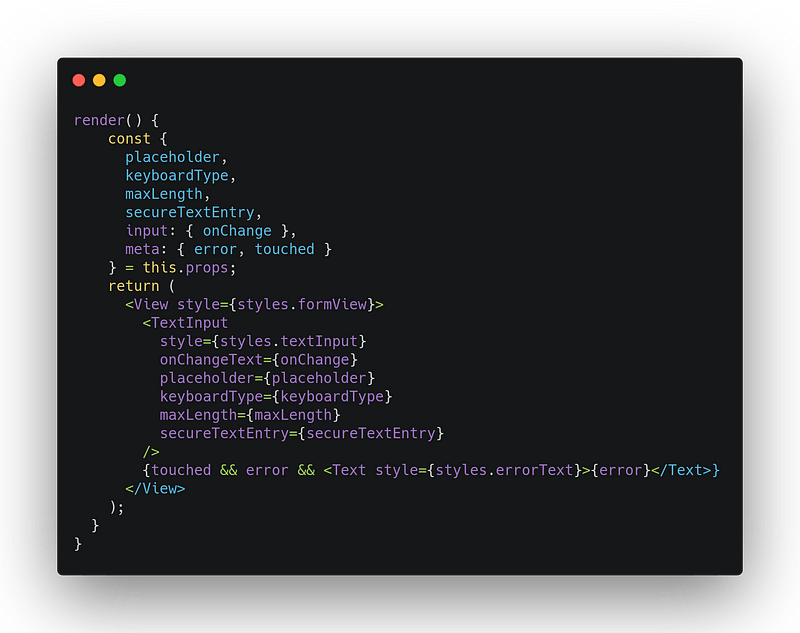
In Components Folder we will create another folder named FormInput.Since we are using the redux form for input we create it as a component.
Admin Module
In the Admin module, we will create three screens namely
Add Driver
List Driver
Detail View
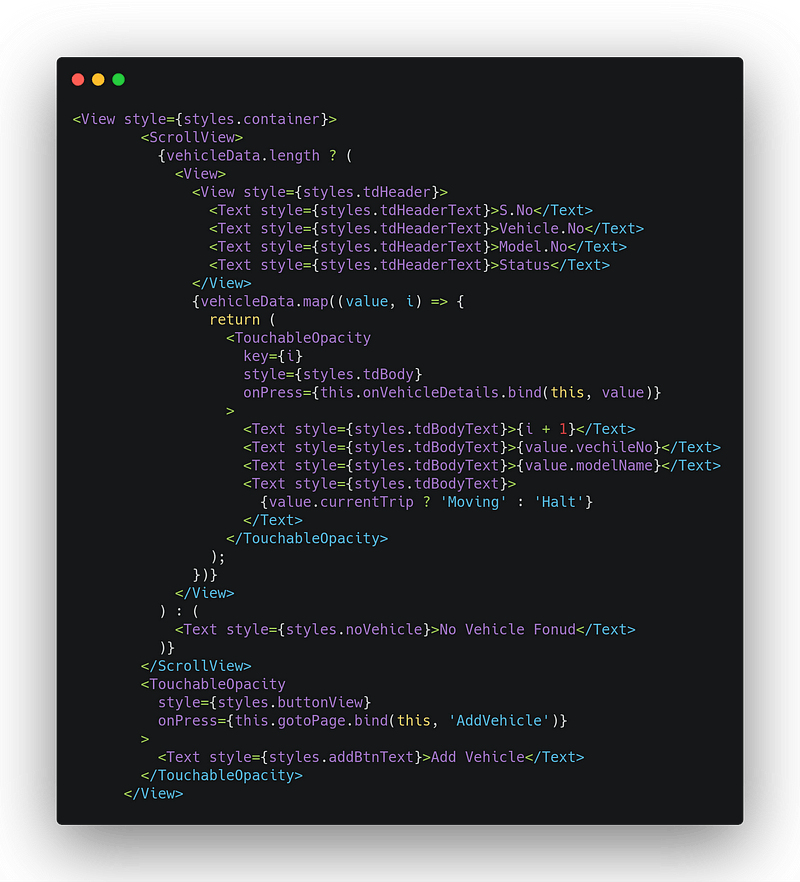
On the List page, we will show the list of drivers with their status once we click an item in the list we will show a map view along the route in which the driver is passing on and in the Add Driver screen we will add a new driver.
- List Driver Screen
2. Add Driver Screen
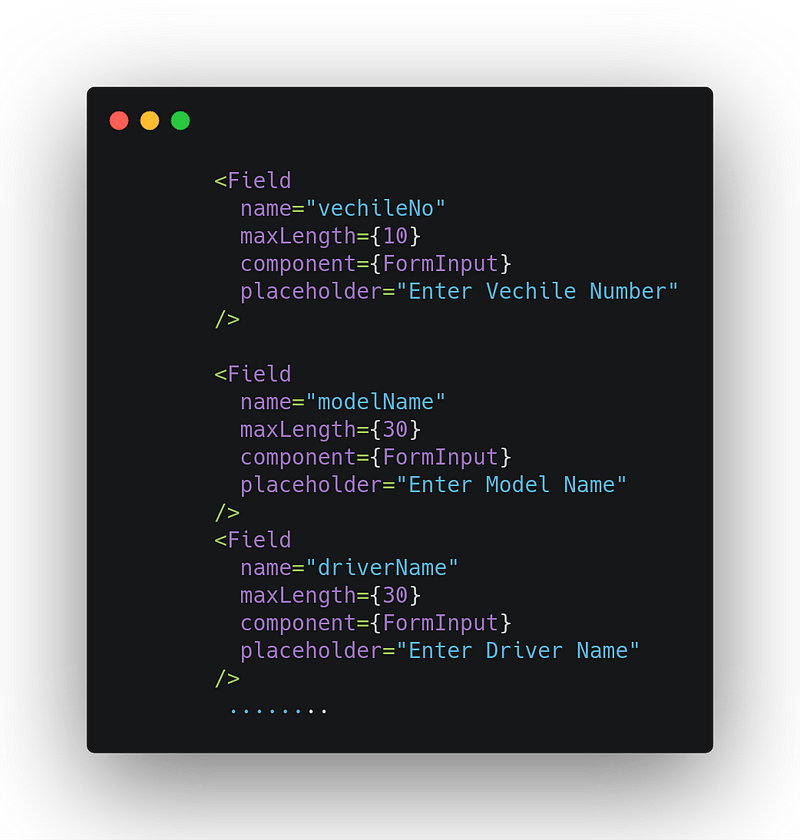
Creating Add vehicle form using the redux form
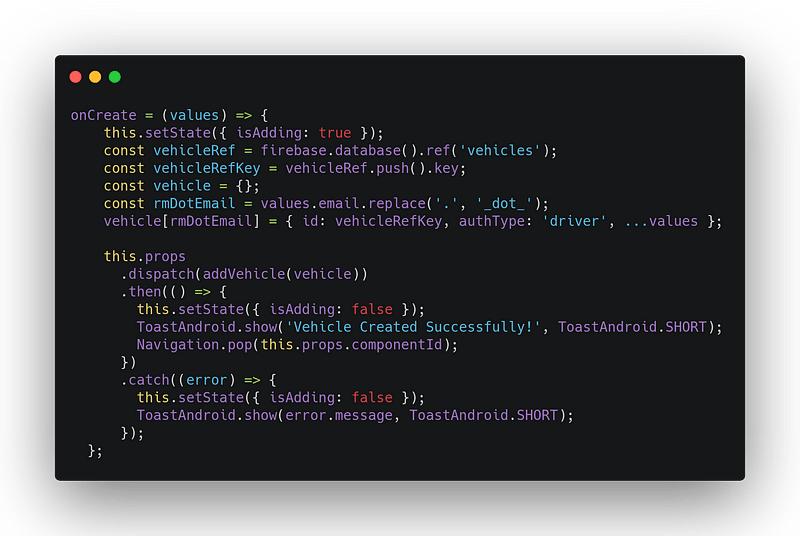
On Form Submit
3. Detail View
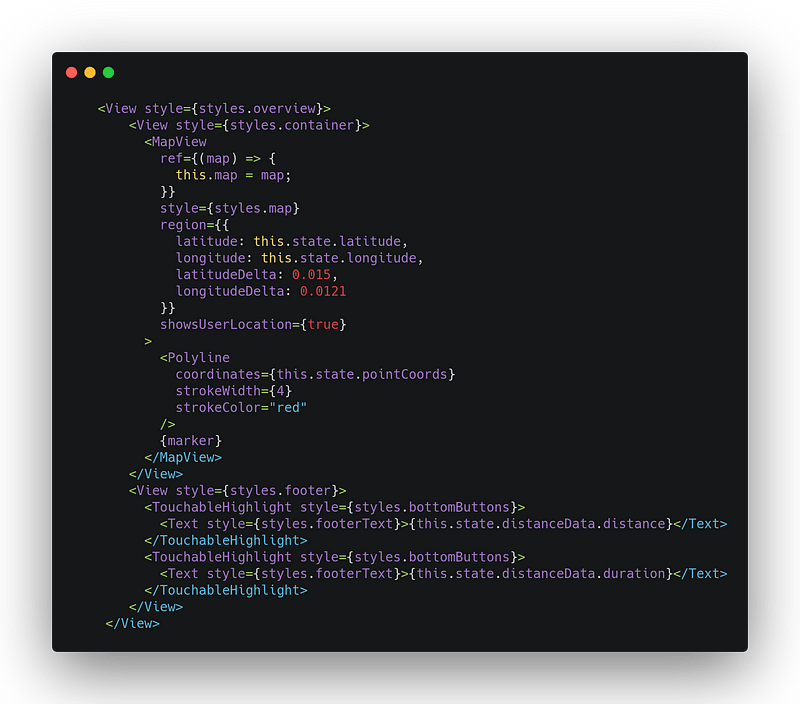
Now we are done with the Admin part and the final section Driver Module.
In the Driver Module we will have only one screen Where the driver can see the current location and enter the source and destination once the source and destination are added it will show the distance and duration to reach the destination.
Once the start button is clicked the trip details will get updated in the firebase.
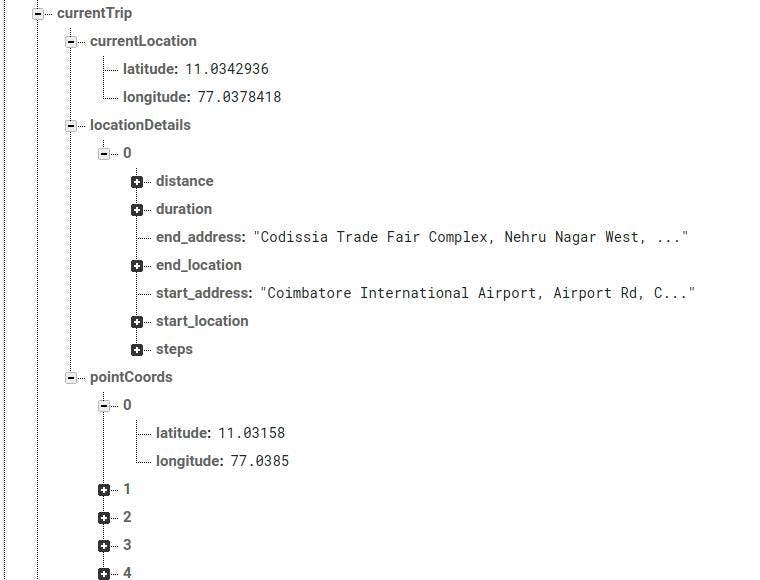
Getting Route Directions
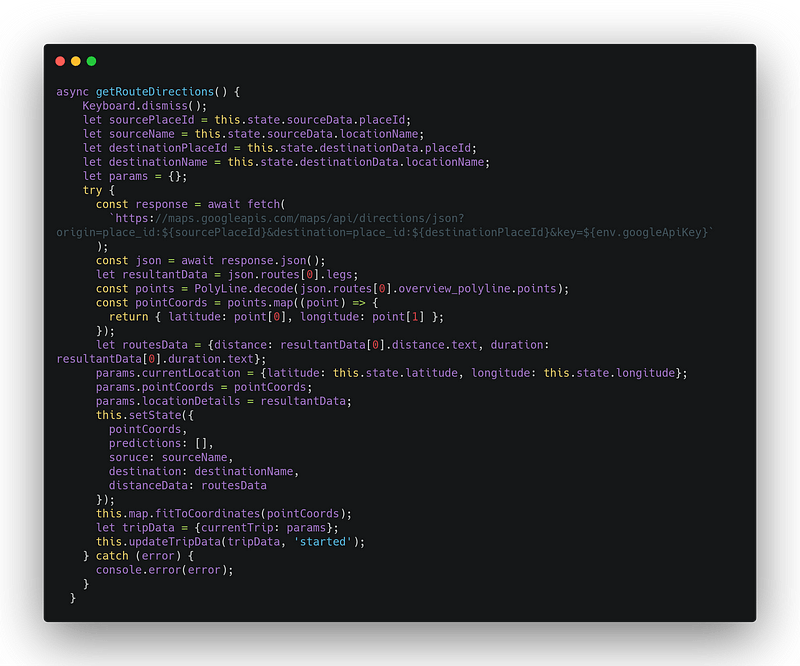
Getting Route Directions
On Location Change
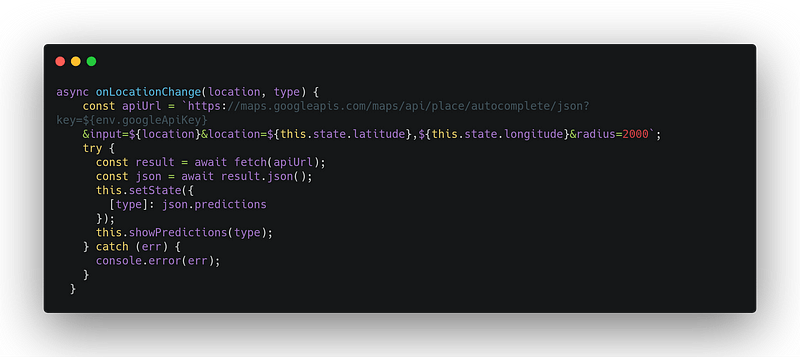
On Location Change
Suggestions for Source and Destination
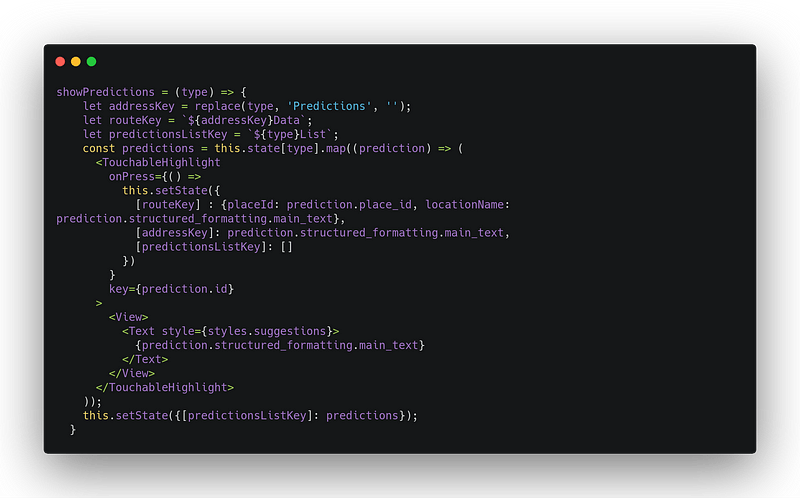
Suggestions for Source and Destination
Updating the trip to Firebase
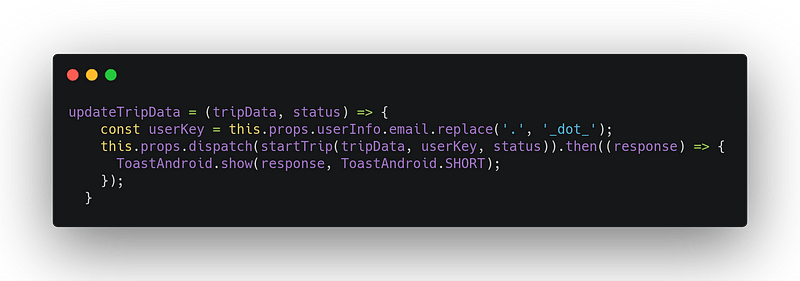
Updating the Trip to Firebase
Redux Action for Updating the trip details
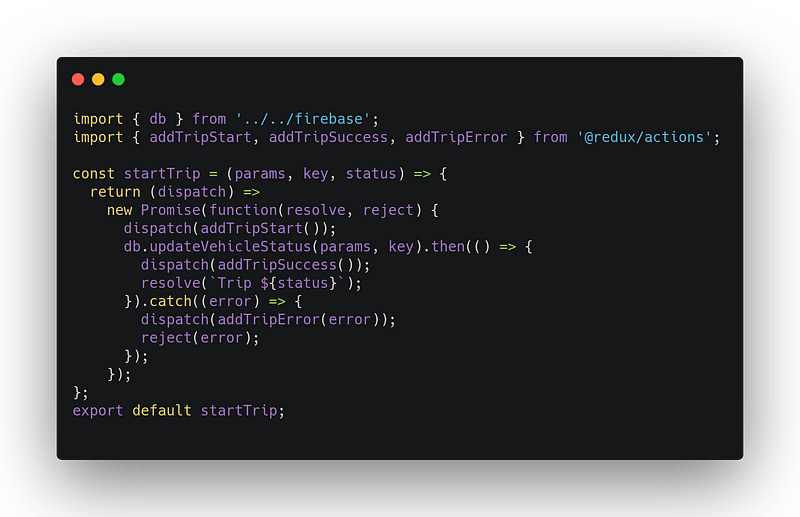
Redux Action
It’s time to run your application and you can see the screens like this
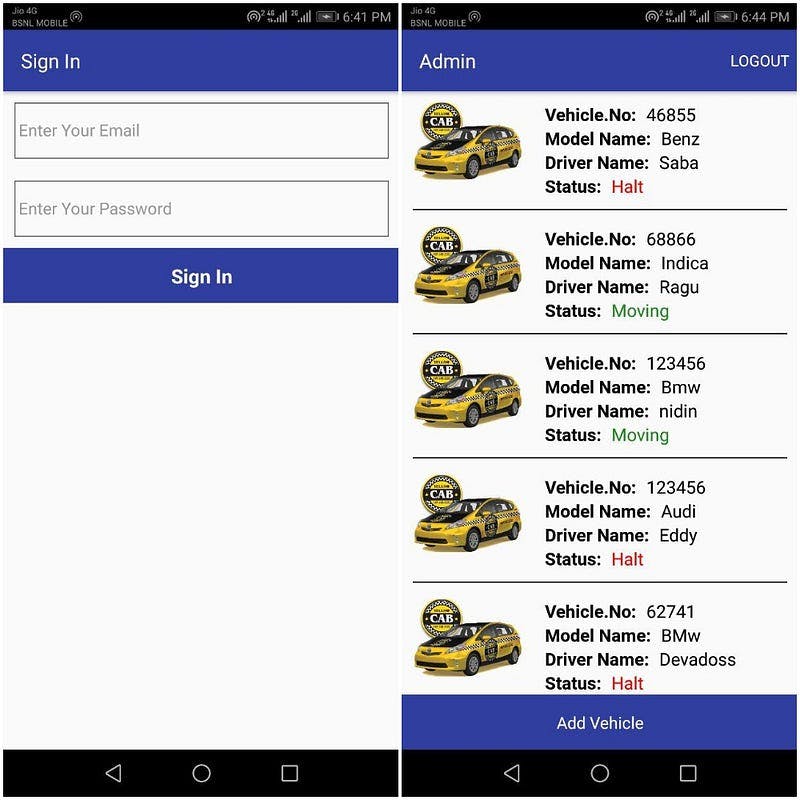
Login & Admin Home Page
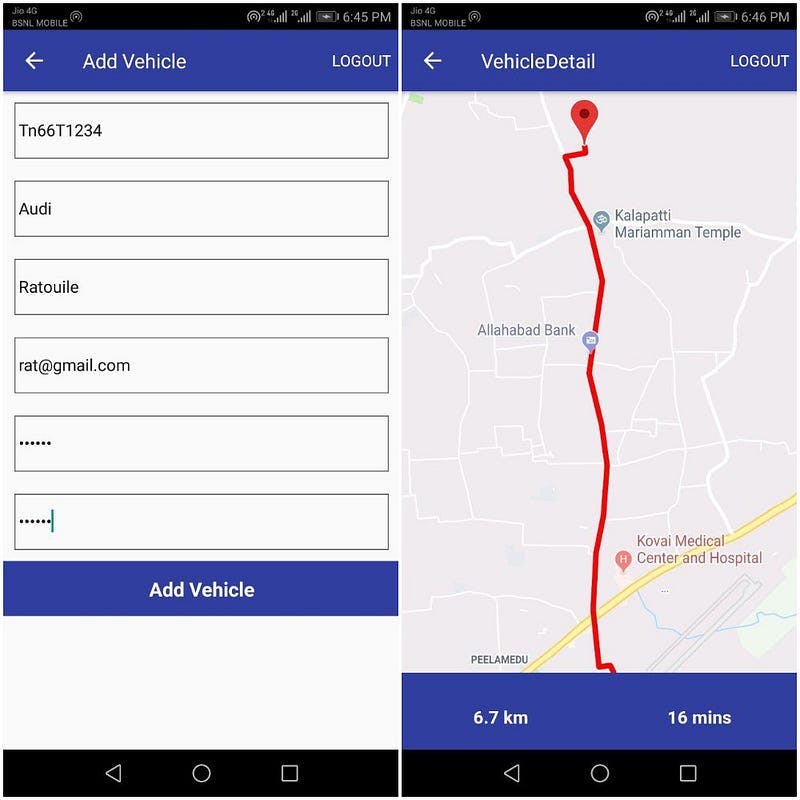
Add a new Vehicle and Detail View of a Vehicle (Admin)
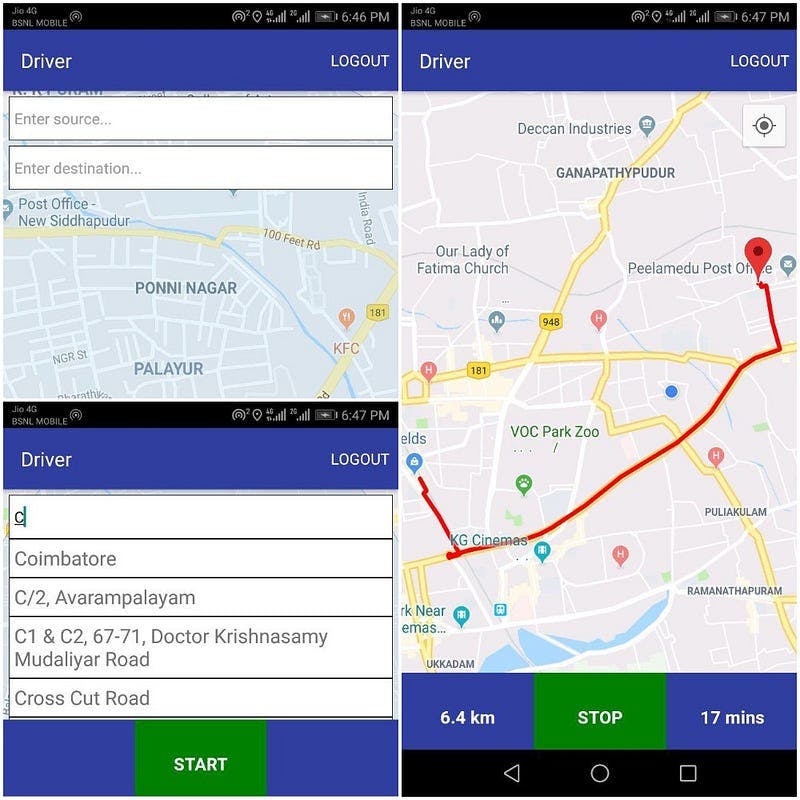
Driver Module — Adding Source and Destination and Starting a Trip
Feel free to have a look at the source code
Reference Links
React-native Navigation Blog Link
Drawing PolyDirections on React native maps with Google Directions — Link
React-native Navigation with redux — Link
Adding Topbar icons in React native navigation — Link
Issues Faced During Development

