Photo by Shahadat Shemul on Unsplash
We will see how to write code that accesses Google developer technologies, all by leveraging one of the mainstream web development languages, JavaScript. Using Google Apps Script, you will write code to extract an address sitting in a cell in a Google Sheet, generate a Google Map based on that address, and send the map as an attachment to yourself or a friend using Gmail.
Objectives
How to use Google Apps Script with various Google services, such as Google Sheets, Google Maps, and Gmail
Develop code in a browser-based code editor
Prerequisite
A web browser with access to the internet
A Google account (G Suite accounts may require administrator approval)
Familiarity with spreadsheets(Not an expert level)
What we are going to do exactly
Learn a bit about Apps Script… enough to get you going
Create a new Google Sheets spreadsheet
Enter a street address in the spreadsheet’s top-left cell (A1)
Learn how to enter the script editor for any document
Edit Apps Script code, save and run it
Use Gmail to see the result!
Let’s get started!
1. What is Google Apps Script?
Google Apps Script is a development platform that makes it fast and easy to create scripts and small applications that integrate with G Suite. With Apps Script, you:
Write code in JavaScript and have access to built-in libraries for favorite G Suite applications like Gmail, Calendar, Drive, and more.
Have nothing to install — A code editor is available in your browser, and your scripts run on Google’s servers.
Don’t have to worry about complex topics such as security and data access permissions, since the platform handles it for you.
Apps Script can be used to create a variety of different applications, from chatbots to web apps. However one of the original and most popular uses it to add additional functionality to a Google Sheets spreadsheet.
2. Create a new Google Sheet & enter a street address
Enter a street address in a new Google Sheet by following these instructions:
- Create a new Google Sheet from this link (sheets.google.com/create), or alternatively, go to your Google Drive (drive.google.com) and click New > Google Sheets > Blank spreadsheet

2. On the blank spreadsheet, go to the first cell in the upper left-hand corner (A1). It will be in column A and row 1. Now enter an address in that cell — pick any worldwide valid street address with a targeted location such as postal code or city and state/province. Here is an example of entering an address in India:
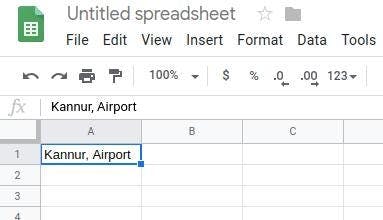
That’s all you have to do in the Sheet. Now we’re ready to enter the editor and write some code!
3. Editing Apps Script code
Now that you have a new Google Sheet, it’s time to edit its bound script. Follow these instructions:
Open the script editor
Select Tools from the menu bar then click on Script editor.
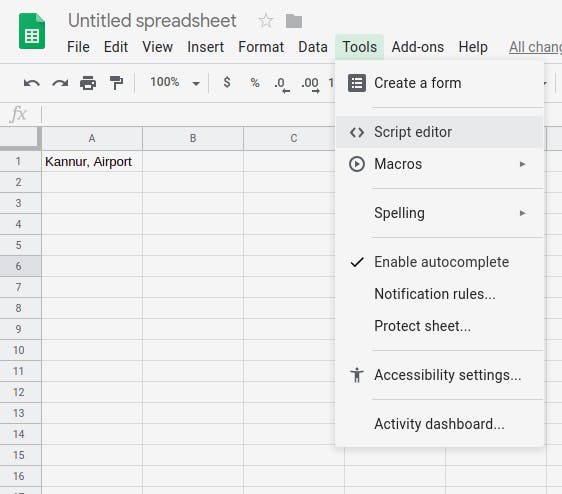
What you see now in your desktop browser is the code editor for the bound script:
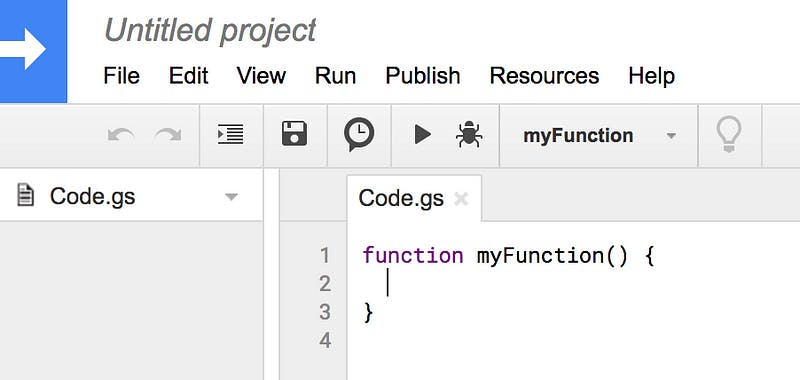
A default function named myFunction() is automatically created for you, and you're dropped into the editor to start coding. That's it... you're now ready to write your application!
4. Editing/replacing the (template) code
The “template” code you’re given is empty and doesn’t do much, so let’s replace that with our application. Copy the code you see below, replacing everything in the editor window with the lines below. Believe it or not, this is the entire application!
The first line is a comment that contains an optional annotation that instructs Apps Script to limit its access to only this one spreadsheet we’re working with (as opposed to all of a user’s spreadsheets). You only need to add it once per script, and it helps give your users peace of mind that the script won’t access other data.
Other than this, the best part is that the 4 lines of sendMap() make up the entire app! Of course, we need to replace the fake email address (friend@example.com) with one of yours. Did you notice when replaced the code in the editor, a red asterisk showed up to the left of the file name?
That just means you’ve edited the file which now needs to be saved. You’ll see it every time you have an unsaved edit.
Save the code
Now save and name your project (call it anything you like — for example, “Hello Maps!”). Save the changes by going to the menu bar and selecting File > Save.
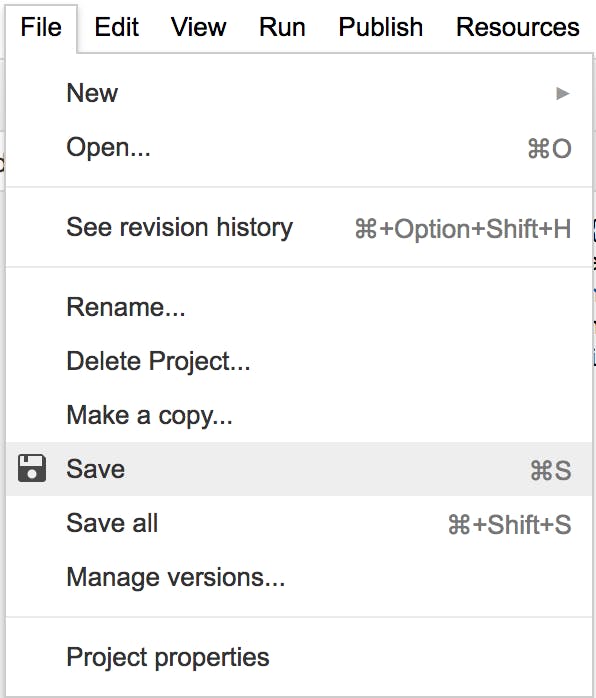
Alternatively, you can click the small disk icon or CTRL-S (PCs, Linux) or Command-S (Mac). If you haven’t named your project yet, you will be prompted to do so before you can proceed.
5. Running the Google Sheets, Maps, and Gmail app
Once named and saved, let’s run it! There are several options here too. Since we renamed the function to sendMap(), select Run > Run function > sendMap:

Alternatively, click on the “run” triangle icon and ensure the function to run is sendMap().
One of the Apps Script features developers appreciate is that you don’t have to write authorization code, which grants the program access to the user’s data. Although Apps Script manages this, users (of your app) still need to grant permission (for this script) to access their spreadsheets and be able to send email through Gmail on your behalf. The first auth dialog looks like this:

Click Review Permissions to continue.
Note: You may get a warning stating your app hasn’t been verified yet. (If you were to launch this publicly, you would go through the formal process of getting your app vetted and verified.) Since we’re only testing this app, you are the developer (and hopefully you trust yourself), it’s okay to proceed by selecting Advanced here. Once you get under the fold, click on the link with the name of your app marked with (unsafe) next to it.
Now you’ll get the OAuth2 dialog window asking for permission to access your Sheet as well as send an email on your behalf:
After you grant permission, the script will run to completion. You won’t see any visual cues other than knowing your script has completed when the tiny yellow execution dialog disappears.
Now check the email account where you sent your message, and you should find a message with Subject “Map” and a message body that looks like this:
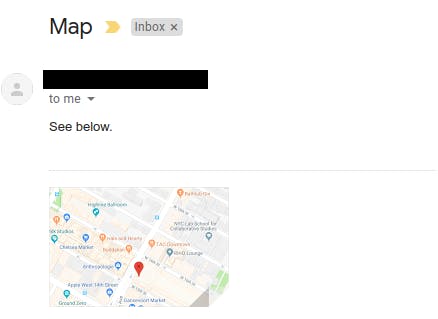
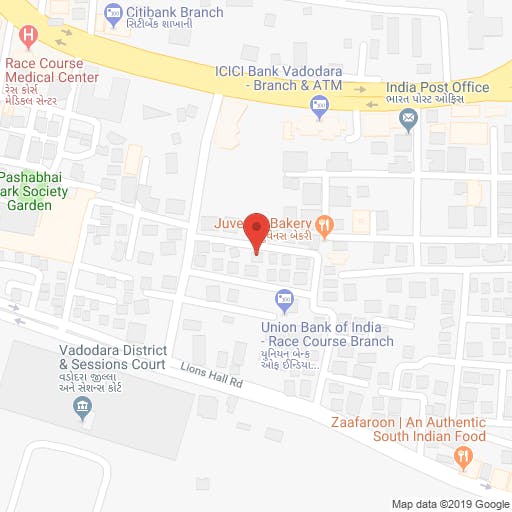
When you open the attachment in the email message, you should get a Google Map with a pin on the address you entered into the Sheet (try other addresses!):
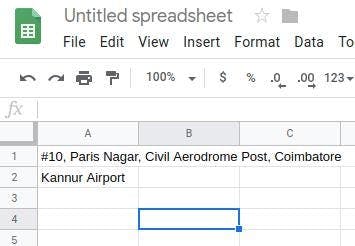
If you want to send the source and destination then add the source in A1 cell and destination in A2 cell like below
Select Tools > Script Editor which will open the code editor again. Replace the below code in the code editor
Save the Code and Click Run You will see the output as below

Code Explanation
Since this application is so short, there’s no overall code structure we can discuss. Instead, we can just walk through line-by-line and review this app which touches three different Google products in just four lines of code!
- This is a normal JavaScript function declaration for
sendMap().
function sendMap() {
2. The first line of code calls the Spreadsheet Service accessible from Apps Script via the [SpreadsheetApp](https://developers.google.com/apps-script/reference/spreadsheet/spreadsheet-app) object. The returned sheet is assigned to a variable of the same name. The [getActiveSheet()](https://developers.google.com/apps-script/reference/spreadsheet/spreadsheet-app#getActiveSheet%28%29) method does exactly what it says it does—it returns a "handle" to the current sheet that is active in the user interface (UI).
var sheet = SpreadsheetApp.getActiveSheet();
3. With the sheet object, reference the cell range (of a single cell) in A1 notation with [getRange()](https://developers.google.com/apps-script/reference/spreadsheet/sheet#getRange%28String%29). A "range" is a group of cells, including just a single one like ours... cell A1, the one we entered the address in. Now let's fetch what's inside that range of cells with the [getValue()](https://developers.google.com/apps-script/reference/spreadsheet/range#getValue%28%29) call, and assigned to the address variable upon return. Try adding more addresses and reading from different cells.
var address = sheet.getRange('A1').getValue();
4. The 3rd line of code connects to the Google Maps Service via the [Maps](https://developers.google.com/apps-script/reference/maps/maps) object. As soon as we have access to the Maps Service, we request a new static map be created via [newStaticMap()](https://developers.google.com/apps-script/reference/maps/maps#newStaticMap%28%29). You can then put a "pin" dropped on the address we pulled from the Sheet by using the [addMarker()](https://developers.google.com/apps-script/reference/maps/static-map#addMarker%28String%29) method.
var map = Maps.newStaticMap().addMarker(address);
5. The last line uses the Gmail Service (via the [MailApp](https://developers.google.com/apps-script/reference/gmail/gmail-app) object), calling its [sendEmail()](https://developers.google.com/apps-script/reference/gmail/gmail-app#sendemailrecipient-subject-body-options) method, to send the email which includes both the text "See below." and the map image as an attachment.
GmailApp.sendEmail('friend@example.com', 'Map', 'See below.', {attachments:[map]});
}
Resources
Documentation
Google Apps Script documentation site
Apps Script Gmail Service
Apps Script Spreadsheet Service
Apps Script Maps Service
Related and general videos
Another Google (Apps) secret? (Apps Script intro video)
Accessing Google Maps from a spreadsheet?!? (video)
Others in Google Apps Script video library
Launchpad Online video series (predecessor to…)
G Suite Dev Show video series
Google CodeLabs
- Gsuite code labs

